I began beading as a young girl living in a small town where, as far as I knew, there were not any other beaders. I taught myself most of what I know but I always wished to find "my people". In my 20's I took to the interwebs and found an amazing little swap group. I made many friends in that group - people who understood and supported my passion. The group has since dwindled down to just a handful of people on Facebook and while I have great friends from it, I miss the big cross-country or cross-continent bead swaps.
Ever since those days, I have been on the lookout for other groups doing something similar.
I found Bead Peeps randomly and joined in on their annual swap & hop challenge. Every participant is paired off and swaps an artisan bead and a clasp (in many cases much more than that). And then we all hop blog to blog (or other social media) to see what everyone made! I was fantastically lucky to be paired with Tina Hemr!
After chatting at length, I decided to send her a plethora of nifty beads from my stash -- everything from lampwork by Marie Sawyer, a bowlerite cab by David Rowland, ceramic by Diana Ptaszynski and much more! I am super excited to see what she does with her goodies.

Tina sent an amazing array of brightly colored beads and a fantastic polymer clay cabochon she made herself! While many of these colors fell into the cool colors I love to work with, they were rather bright so I felt I needed to really consider how to balance them out.

The cabochon itself delivered my first challenge. It is paisley shaped which means there is a concave section. I have encountered this problem before -- the typical peyote-stitched bezel will not curve inward! Stitched normally, the bezel will stretch from the top-most point of the curve on one side to the top-most point on the other side. This means that instead of curving inward and hugging the cab, it creates a straight edge which stands out from the curve. While there are many ways to bezel a cab I knew I wanted to figure this out once and for all!

After some consideration, I determined the primary problem is that the curve creates more surface area which isn't being addressed. I used my intuition to add beads as I built the bezel wall and discovered I resolved the issue! Despite how it annoyed me in previous attempts, had never spent the time to figure it out!

From the start I wanted this piece to be really dramatic but upon finishing the bezel and adding accent beads, I was at a bit of a stand-still. Tina had let me know the cab was made using the polymer clay technique, mokume gane. I thought I might try to replicate this technique and add a few small matching cabs, however, I am not a polymer clay artist and I have never done this technique. My sister-in-law, however, is an incredible polymer clay artist...so I approached her with some packs of matching clay and lofty dreams. We spent an entire evening trying this technique and funny enough, I never got around to making matching cabs. *shrugs* We had so much fun testing things out that it just didn't happen. Eh...the best laid plans of mice and men....
So there I was, feeling like I was teetering on the edge of coolness but completely stuck. When this happens, I usually sort beads. This is one of those endless tasks that is never REALLY done. While sorting, I found a package of soutache that needed to be put away in my fibers box....and there it was...
Looking through my fibers box, it almost immediately dawned on me that this piece of GORGEOUS trim I purchased from MOOD in New York City years ago was literally THE thing I needed. It was perfect.

I was in love with this piece of trim the day I purchased it, and still am! It is thick, luscious and perfect for beadwork. I decided to cut several of the waves out of the trim, bead them and then decide how I wanted to arrange them. I was buzzing with creative excitement!


Once the individual waves were cut out, I glued them to a piece of Nicole's Bead Backing, stitched them down following the lines of thread and began to bead around the trim. The longer I spent making these pieces, the more excited I got. This was the first time I had used trim in a piece and I have ever seen it used this particular way in bead embroidery! Regardless, it felt fresh, new and exciting.

Ultimately I made 6 of these pieces and played with the arrangement of them over and over until I felt I had it "right".

I then doubled back to the cab and brought in some of the colors from the cab along the outside rim before trimming, backing and edging it.

Finally, I began the assembly. Using the edging as well as the backing & ultrasuede as anchors, I thoughtfully assembled each piece. As you can see, I planned this out so that the back would be as colorful as the front.

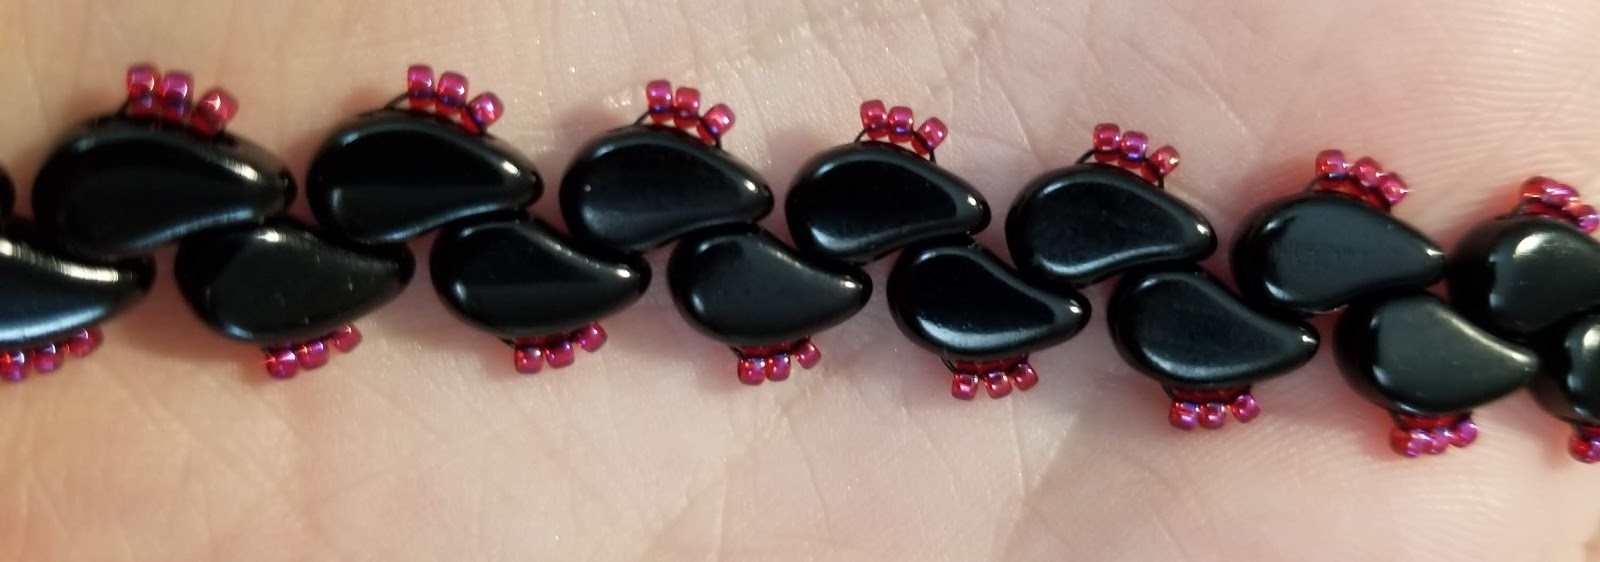
Once all the pieces were securely attached, I had to determine what kind of straps to use. At first I thought I would make a beaded strap and thought about continuing the paisley by using Paisley Duo beads. I wove a strap but quickly realized that it took away from the overall look of the piece.
In the end the best option was a simple chain strap using the simple toggle clasp Tina provided. I attached the strap to the piece using a bead loop and jumpring.

And now for the reveal! I am SUPER pleased with how this piece turned out. Thanks to Tina and her amazing work, I was able to teach myself several new skills and create a dramatic piece I feel compliments her work beautifully! Enjoy!

Nope...this isn't the end! At the last minute I decided I NEEDED to do something with the cool little polymer clay flowers and leaves Tina made...
First, I put a piece of scrap ultrasuede on top of Lacy's Stiff Stuff, glued down the leaves, beaded thru the leaf holes and beaded around the outside of them.

Then I added each flower one-by-one.

Next, I cut it out, backed it with the rest of the scrap ultrasuede and edged the piece.

Lastly, I created loops, and put together a chain with bead accents, and added flower stems. This little gem really turned out cute!

I really hope you have enjoyed seeing how I created my pieces for this hop! Please make sure to 'hop' through the list of participant's below!
Other Participants
Kelly
Rodgers - You are here!