
I need to confess that I was shocked at how long it has been since I last wrote a blog post. While it appears as if I took a hiatus, that is far from the case. I have been writing instructions, teaching classes and creating but my schedule looks like color-coded organized chaos. That aside, I wanted to share an adventure I went on recently.
A few weeks back my incredibly talented sister-in-law, Hailey Rodgers of Found in Fire Studios, asked if I would attend a Blue Ridge Polymer Clay Guild Meeting in Asheville, NC. The meeting we would be attending included a heart swap. Everyone would make a heart-themed polymer clay item and would swap with another artist during the meeting. Now, let me be clear -- I am NOT a polymer clay artist. I have dabbled in the medium but never really did much with it...regardless, I thought I would give it a try.

I decided I would make a cabochon I could bead and make into a necklace - this way I incorporate MY talent into something that would likely be a disaster otherwise.
I started with a lump of grey Sculpy Souffle. This is supposed to be a softer clay but honestly, if any of you have ever conditioned clay, it was still a utter pain in the tookus to condition -- just less than other clays. Once the clay was soft enough, I flattened it with my hands and then smooshed it flat with a big jewelers steel block (I didn't have anything to roll it out with). Then, I found like the only 2 stamps I have in my possession and pressed one into the clay. Unimpressive. (Or impressive, if you want to be punny.)


I was concerned about protecting the surface of the cab since any little ding would damage the eyeshadow treatment. So.....I RESINED IT! I have NEVER tried resin in any form so this also was an adventure. I followed the instructions to the letter. Well...sort of. I did have a cleaning-up disaster in which I completely panicked, had sticky goo all over my hands, the cups, my alcohol bottle, soap bars and my entire bathroom sink but that story is reserved for live action storytelling since it requires lots of muppety arms and wild gesturing. I digress...once the resin set, I began the bezel capture.


I started with a lump of grey Sculpy Souffle. This is supposed to be a softer clay but honestly, if any of you have ever conditioned clay, it was still a utter pain in the tookus to condition -- just less than other clays. Once the clay was soft enough, I flattened it with my hands and then smooshed it flat with a big jewelers steel block (I didn't have anything to roll it out with). Then, I found like the only 2 stamps I have in my possession and pressed one into the clay. Unimpressive. (Or impressive, if you want to be punny.)
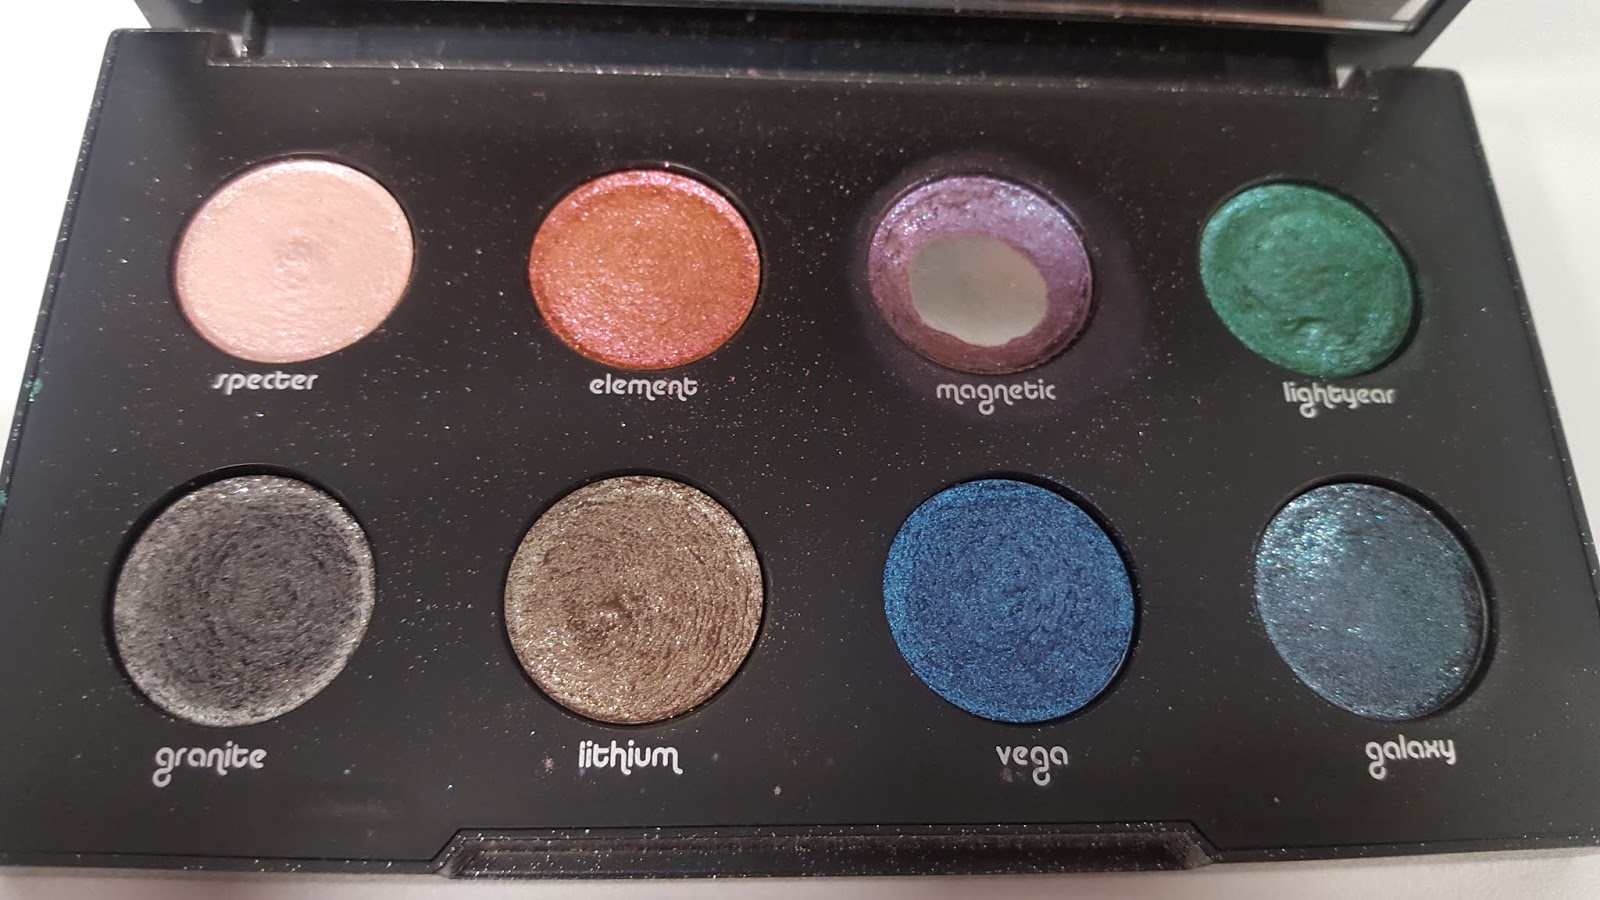
I originally intended to use acrylic paint to help the image stand out but I was running out of time (I had about 36 hours to get this done) and the stamp impression was very shallow - which meant it would be hard to only highlight the upper level with paint. I remembered that some polymer clay artists use mica powder on their pieces...I didn't have that either. But I did have a very expensive and uber glittery eyeshadow palette...Urban Decay's Moondust Palette, for you curious ones out there.
I took a few colors, and lightly rubbed the surface of the clay with the eyeshadow and WALLA! It worked!! I baked the clay and pulled this out of the oven:

I realize this isn't terribly exciting (yet)...but it was to me! I wish the photos could adequately capture the color and shine of the eyeshadow...

Aside from the afore mentioned clean-up disaster, this was a smashing success! The resin not only protects the surface treatment, it brought depth, gloss and a "finished" look to the cab. I chose a shiny blue AB finished Delica bead and began to bezel the cab. The odd shape I cut made the dip of the heart a little challenging, but it turned out beautifully.

I wanted this pendant to be relatively simple since the star is the polymer clay cab itself. I chose a pinkish mauve size 8 seed bead to border the heart and then cut away the excess backing.


The last few steps were typical - apply the Ultra Suede to the back, edge the piece, add a little bit of "laciness" to the edging, add a crystal drop and attach straps! The final piece surprised me! It was almost difficult to give it away!

I definitely learned a lot from this process and have since purchased some black clay and mica powder - I figure there will be future reasons to use this technique so I should be ready, right?
I do have to brag a little on my sister-in-law (see piece below). She constructed this with a foil form wrapped in Sculpy and sculpted. She then used her incredible painting skills and hand painted it!

The class demo for the meeting was actually to make template plates with different textures that we could take home. I made a couple and am excited to try them on my newly learned technique!

I hope you enjoyed going on this adventure with me! Be looking for another post soon!
No comments:
Post a Comment